|
We've been
turning our attention to the rear brakes and hubs. Again we
found the linings to be in good condition, but like the
front axle the taper roller bearings were showing signs of
wear. Further dismantling revealed that the nearside oil
seal was starting to break up. This is made of felt and had
attached itself to the ring that the hub butts on to. It
looked as though the cage had been rotating but the seal
hadn't and both needed replacement. Spares weren't readily
available in the UK and although David had offered to send a
pair of seals from Turramurra stores, the time factor was
critical. We decided to do away with the old felt seals and
their cages and replace with new modern lip seals.
But this can lead to its own problems. The hub is designed
to rotate against the abutment ring with the felt seals in
between. However, the new lip seals need a little bit of
clearance otherwise the friction created would soon wreck
them. To get the required clearance we had to shim the hub
out just enough to get a feeler gauge in between the ring
and the new seal. It then followed that the hub clamping
bolt would not screw up far enough to allow the lock screw
to line up with the hole in the axle tube. The manual says
you can drill and tap a new hole in the axle tube, but we
were reluctant to do that. The problem was solved by
adjusting shims and that did the business.
A final check on all the grease points revealed that two of
the four points which lubricate the brake cam spindles were
not taking grease. Each cam spindle is located by two
tubular castings with brass bush inserts. Both spindles were
removed and it was discovered that two of the four brass
bushes had turned by about 90 degrees, thereby effectively
blanking off their greasing points. The offside bush was
removed and re-inserted so that it was correctly orientated
with the grease nipple. But the other bush refused to budge
and it was clear that it was not going to come out without
damaging it. A new hole was drilled in the bush through the
grease nipple aperture and this resolved the problem.
When we refitted the half shafts we noticed that the bolt
holes in the nearside driving flange were elongated. At some
point the bus had been running with these bolts not fully
tightened and this had caused the wear in the driving
flange. Additionally one of the driving flange bolts was
missing altogether and an HD replacement would not tighten
because the thread in the hub was stripped. The hub was
taken to a bench where a Helicoil thread repair insert was
fitted. Finally a replacement driving flange was sourced
from Davies donor HD lorry. With this fitted, the overhaul
of the rear brakes and hubs was complete.
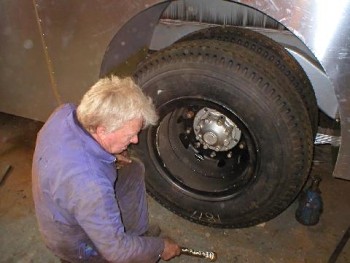
During the last few weeks Jasper has fitted six new tyres,
tubes and flaps onto our newly shotblasted and painted
wheels. Having finished the brake overhaul we worked late
that evening to get the wheels fitted as the bus may soon
require to be moved to get more headroom for repanelling the
roof..
|
|
 |
|
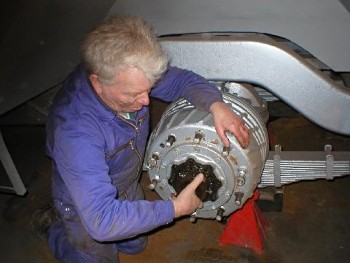
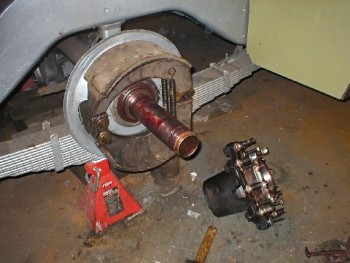
The rear brake and hub
overhaul begins. John removes the clamping
bolt from the hub
|
|
 |
|
And then the
brake shoes.
|
|
 |
|
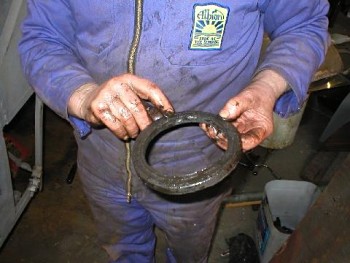
John
examines the felt oil seal. It's split and cannot be reused.
|
|
 |
|
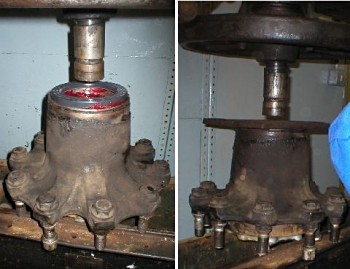
Left: The
hub is placed in the press and a new lip type seal sits in
its recess ready to be eased into place. Right: The plate
goes in and the seal gets pressed snugly into place.
|
|
 |
|
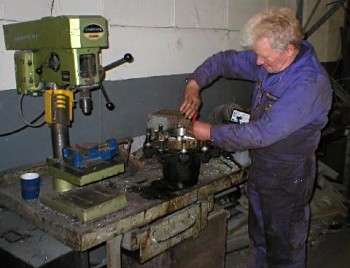
One
of the threads for retaining a driving flange bolt is found
to be stripped, so a new Helicoil insert is fitted.
|
|
 |
|
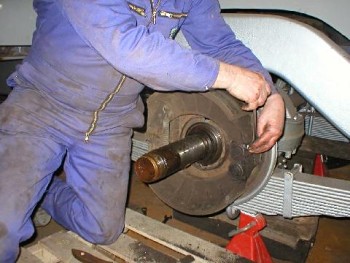
The hub, complete with
Helicoil insert and new seal, awaits fitment. With the new
type of seal fitted, the hub will now require a few thou
clearance to the abutment ring which is visible between the
brake shoes.
|
|
 |
|
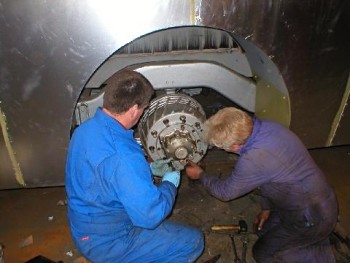
The hub goes
back on and the driving flange now has a full set of bolts.
|
|
 |
|
The wheels
go back on with their new 10.00 x 20 tyres.
|
|
 |
|
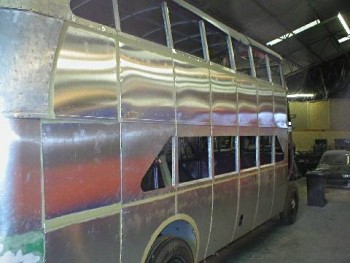
And
meanwhile the panelling is proceeding apace. |